
Follow our step-by-step guide to a smooth roof replacement process for your Rockville, MD home.
What to Expect During a Roof Replacement in Rockville, MD (Step-by-Step Guide)
A roof replacement is one of the most significant home improvement projects a Rockville homeowner can undertake. It is also one of the most important. Your roof is the primary barrier protecting your home and everything inside it from the elements. Done correctly, a full replacement gives your home a fresh start with decades of reliable protection.
Most homeowners replace their roof only once or twice in a lifetime. The process can feel unfamiliar, especially when contractors work on your roof, equipment fills your yard, and the scope stretches far beyond a routine repair. This step-by-step guide explains exactly what to expect during a professional roof replacement in Rockville from the initial inspection through the final walkthrough so you can approach the process with confidence and clarity.
Step 1: Initial Inspection and Assessment
Every professional roof replacement begins with a thorough inspection. A roofing professional will assess the condition of your shingles, underlayment, flashing, decking, gutters, and ventilation system. The goal is to understand the full picture — not just visible damage, but what the entire roofing system needs to reach proper working condition.
A professional inspection also identifies structural issues — soft or rotted decking, improperly installed flashing, or inadequate attic ventilation — that need correction during the replacement. Addressing these issues at the same time is far more cost-effective than returning to fix them later.
If you’re unsure whether your roof needs repair or replacement, check out our guide on how to tell if your roof needs repair or full replacement in Rockville, MD to better understand what professionals look for during an inspection.
Step 2: Material Selection
Choosing the Right Shingles
Once the inspection is complete, you and your roofing contractor will select the materials for your new roof. This decision shapes the performance, appearance, and lifespan of your new roof, so it deserves careful thought.
Asphalt shingles are the most common choice for Rockville residential roofs. They come in a wide range of colors, styles, and quality tiers. Architectural shingles are generally the better pick over standard three-tab shingles — they offer improved durability, stronger wind resistance, and better visual depth.
HF Roofing Contractors installs roofing systems from three respected manufacturers: : GAF, Owens Corning, and CertainTeed. Each offers multiple product lines at different price and performance points, and your contractor can walk you through the options to find the right fit for your home and budget.
Premium Material Options
If you are considering a premium upgrade such as metal roofing, slate roofing, and cedar shake roofing this is the time to have that conversation. Your contractor can explain the cost difference and long-term performance implications before you finalize your material selection.
Step 3: Obtaining Permits
A full roof replacement in Rockville typically requires a building permit from Montgomery County. Your roofing contractor should handle the permit application as part of the project. If a contractor suggests skipping the permit to save time or money, treat that as a serious red flag.
Unpermitted work can create complications with your homeowner’s insurance and with future property sales. The permit process adds a small amount of time before the project starts, but it ensures the work is inspected and documented as meeting local building codes and that documentation becomes part of your home’s permanent record.
Step 4: Preparing Your Home for the Project
Before the roofing crew arrives, take a few steps to protect your home and minimize disruption:
- Move vehicles out of the driveway and away from the work area. This gives the crew clear access and protects your cars from falling debris.
- Remove or cover outdoor furniture, garden decor, and potted plants near the house. Falling materials can cause damage.
- Give your neighbors a heads-up about the project. The noise and activity can disrupt adjacent properties.
- Move fragile items away from interior walls. Vibration from removal and installation work can occasionally shift items on walls or shelves.
- Keep pets inside and away from the work area for the full duration of the project.
Step 5: Removal of the Old Roofing Material
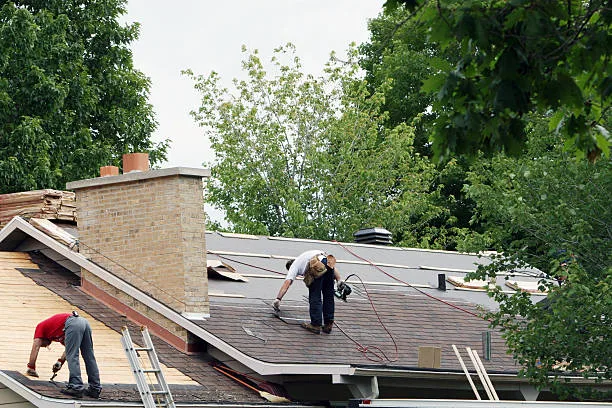
On the first day of the project, the crew removes the existing roofing material down to the decking. This means tearing off all shingles, underlayment, and in most cases the old flashing. Tarps and catch systems keep debris from spreading across your yard and landscaping.
The tear-off phase is the noisiest part of the job. For a typical Rockville residential roof, it usually takes a few hours to a full day, depending on roof size, complexity, and the number of layers the crew removes.
Maryland building code generally limits roofing stacks to two layers. If your home already has two layers of shingles, the crew must remove all existing material before installing anything new.
Step 6: Decking Inspection and Repair
With the old material removed, the crew inspects the exposed decking for damage, rot, delamination, or structural weakness. This step is only possible after removing the old roofing — and it is one reason why your written estimate should include a provision for deck repairs.
Any damaged sections receive replacement plywood or OSB board before installation continues. This gives the new roofing system a solid, dry, and structurally sound foundation. Installing new roofing over damaged decking would undermine the value of the entire replacement.
Step 7: Installation of Underlayment and Ice and Water Barrier
Before any shingles go on, the crew installs the underlayment — a water-resistant membrane between the decking and the shingles that provides a secondary line of defense against water infiltration.
Along the eaves and in roof valleys, the crew also installs a self-adhering ice and water barrier membrane. This thicker, more adhesive layer protects against water backup caused by ice dams — a critical concern for Rockville winters — and it provides enhanced protection in the areas most vulnerable to standing water.
Step 8: Flashing Installation
New flashing goes around every penetration and transition point on the roof — chimneys, skylights, vent pipes, walls, and valleys. Properly installed flashing is essential to long-term waterproofing performance. This is an area where craftsmanship and attention to detail make a real difference. If your home has skylights that need attention, the team can address both the skylight flashing and the skylight unit itself through our skylight repair and replacement service.
Step 9: Shingle Installation
With the underlayment, ice and water barrier, and flashing in place, shingle installation begins. The crew starts at the eaves and works up toward the ridge. Each course overlaps the one below in a pattern that keeps water flowing over — not under — the shingles.
Ridge cap shingles go on last, covering the peak of the roof and completing the visual profile. Ridge cap installation often incorporates ridge ventilation components that allow heat and moisture to escape from the attic space.
Step 10: Cleanup and Final Inspection
After the crew completes shingle installation, they conduct a thorough cleanup. This includes raking the yard for nails and debris using magnetic rollers, hauling away all roofing waste, and restoring the work area to its pre-project condition as fully as possible.
A final walkthrough inspection confirms that all aspects of the installation meet quality standards. The crew checks that flashing is properly sealed, ridge caps are correctly installed, shingle alignment is consistent, and all penetrations are fully addressed.
Your contractor should also walk you through the warranty documentation for both the roofing material and the workmanship. Knowing what your warranties cover and how to file a claim if needed is an important final step.
Step 11: Gutter Inspection and Update
A roof replacement is an excellent time to assess your gutters. They work directly with your new roofing system to manage water drainage. Old, damaged, or undersized gutters can undermine even a new roof by allowing water to back up at the roofline.
If your gutters need replacement or an upgrade, seamless gutter installation can coordinate with your roofing project for a complete, properly integrated water management system. Seamless gutters eliminate the seam joints where traditional sectional gutters typically develop leaks.
How Long Does a Roof Replacement Take in Rockville?
Most residential roof replacements in Rockville wrap up in one to two days for a standard single-family home. Larger homes, roofs with complex geometry, or projects with significant decking repairs may take three to four days. Specialty materials such as slate or metal have longer installation timelines.
Weather is the most common variable that affects the schedule. Crews cannot install roofing safely during active rain, high winds, or temperatures below the manufacturer’s minimum for adhesive performance. Your contractor will monitor the forecast and communicate any weather-related schedule changes.
Frequently Asked Questions
You do not need to be home throughout the entire project. Plan to be available on the first morning to meet the crew, review the project scope, and answer any questions. Stay reachable by phone during the day in case any decisions come up.
Professional roofing crews use tarps and catch systems to minimize debris spread. Move potted plants and delicate items away from the immediate work area before the project starts. Some minor impact to grass and plantings right next to the house is possible with any roofing project.
Your new roof will typically come with two warranties: a manufacturer’s product warranty covering defects in the shingles themselves, and a workmanship warranty from your roofing contractor covering the quality of the installation. Review both carefully and keep the documentation in a safe place.
Roof replacement in Maryland is possible in winter as long as temperatures stay above the minimum required for shingle adhesive activation — typically around 40°F. Winter installations require extra care, but they are not inherently problematic for an experienced crew.
Professional Roof Replacement Services in Rockville, MD
HF Roofing Contractors provides complete roof replacement services throughout Rockville MD and the greater Montgomery County area, with installations backed by manufacturer warranties and a craftsmanship warranty on every project.
Check our current roofing promotions for any available offers on new installations.